KoBo Toolbox for Geographic Data Collection
Sierra Mabanta, Emily Hurry, Arielle Rose & Alex Mandel
Geospatial and Farming Systems Research Consortium University of California, Davis
This guide helps you to:
- Create and Setup a KoBo Collect Account
- Use Geo-type Questions
- Download forms from an account
- Import CSV files to QGIS
- Collect Data with KoBoCollect using an Android Device
- Upload finalized data
- Review Data Online
- Upload Data to a Computer Without Wifi
- Misc information
- View GPS Points
- Open Data
- Open Data on an Android Device
- Review Data on a Computer without Internet
What you’ll need:
- An Android tablet or phone and a computer
- KoBoCollect on mobile device or use KoBoToolbox on a computer.
- An Kobo account
Create and Setup a KoBoCollect Account
KoboToolbox website
- Scroll down on the page until you reach “Create An account or Log In”. Be cure to select the option “RESEARCHERS, AID WORKERS & EVERYONE ELSE” and select “Sign Up of Log in” to create an account with Kobo toolbox
RESEARCHERS, AID WORKERS & EVERYONE ELSE Provided by KoBoToolbox: Get support from our community.
- After you create an account follow the activation link through an email. You will be prompted to a new page.
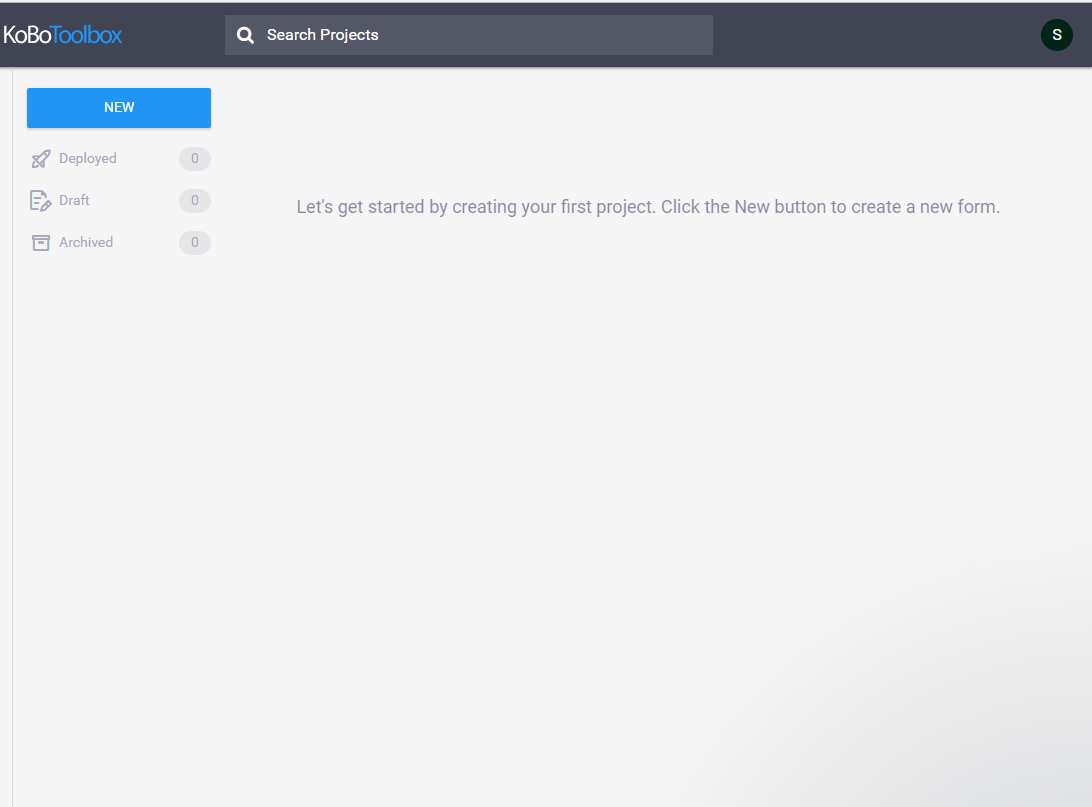
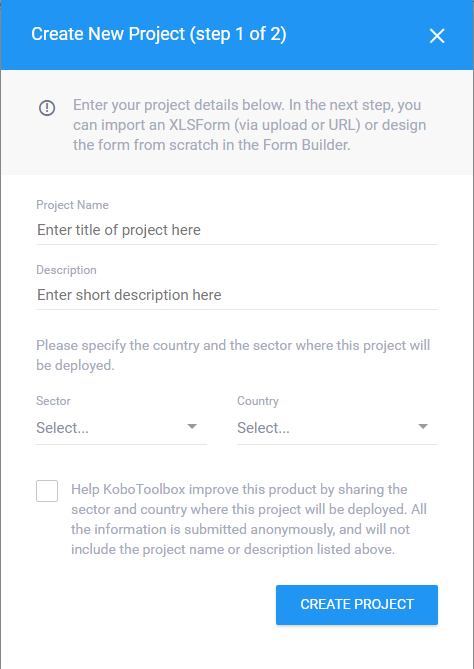
- It’s time to create your first form. You will be prompted to a new page after creating an account. Click on “New” on the top left corner of the page. Give the project a name, description, sector, and country. Select “create project”.

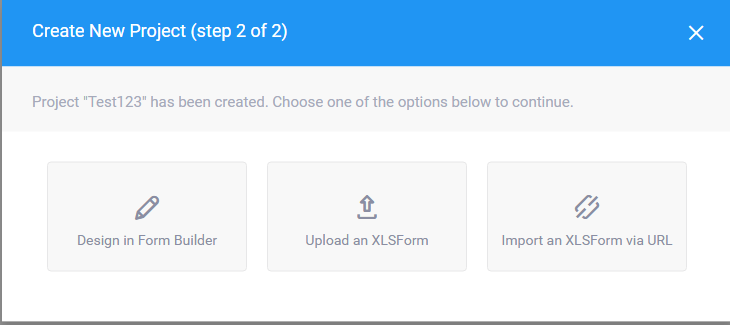
- A pop-up will appear, select “Design in Form Builder”.
Geo-Type Questions
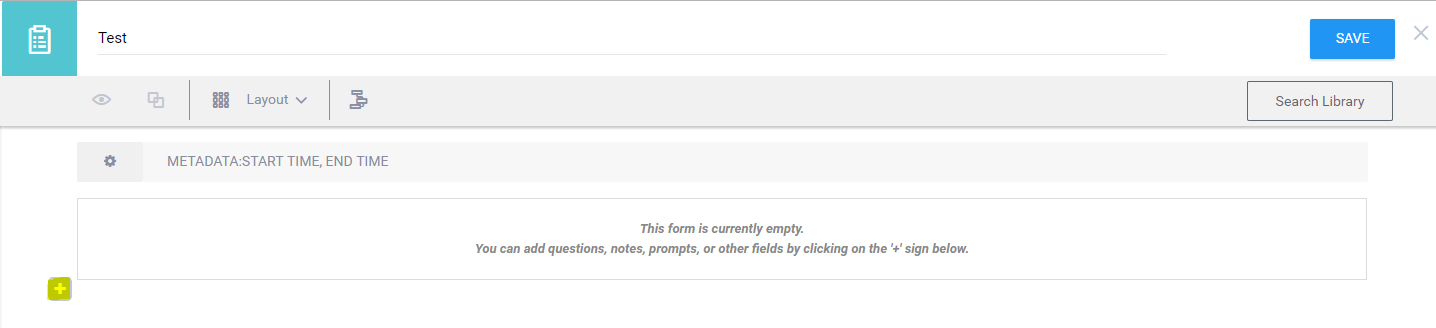
- Click on the plus sign on the left side of the page. Type in a question in the search bar and click “add question”. If the question is a geography question, select Point, Line or Area. You may also select Text if you have a metadata question.
Here are the different Types of Geo Responses you can Use:
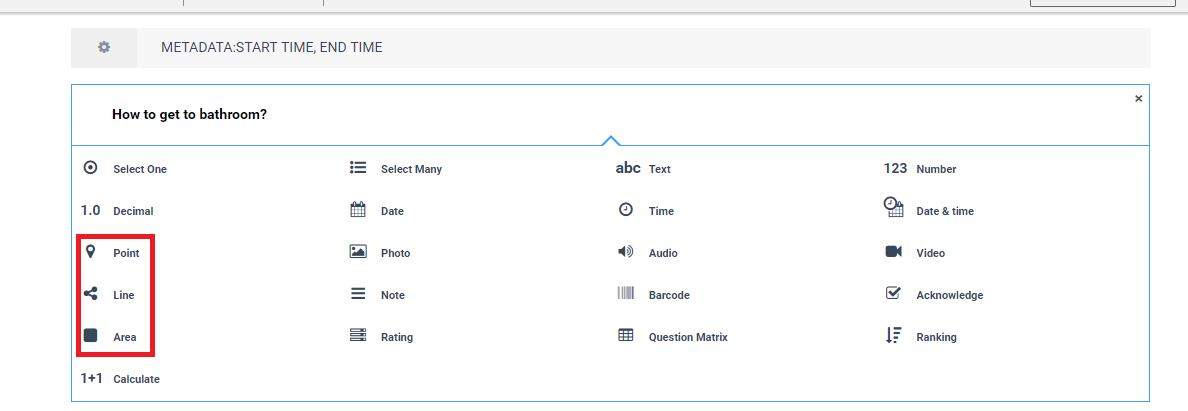
- Once you type in a question and a preferred response type. The symbol will be to the left of the new question.
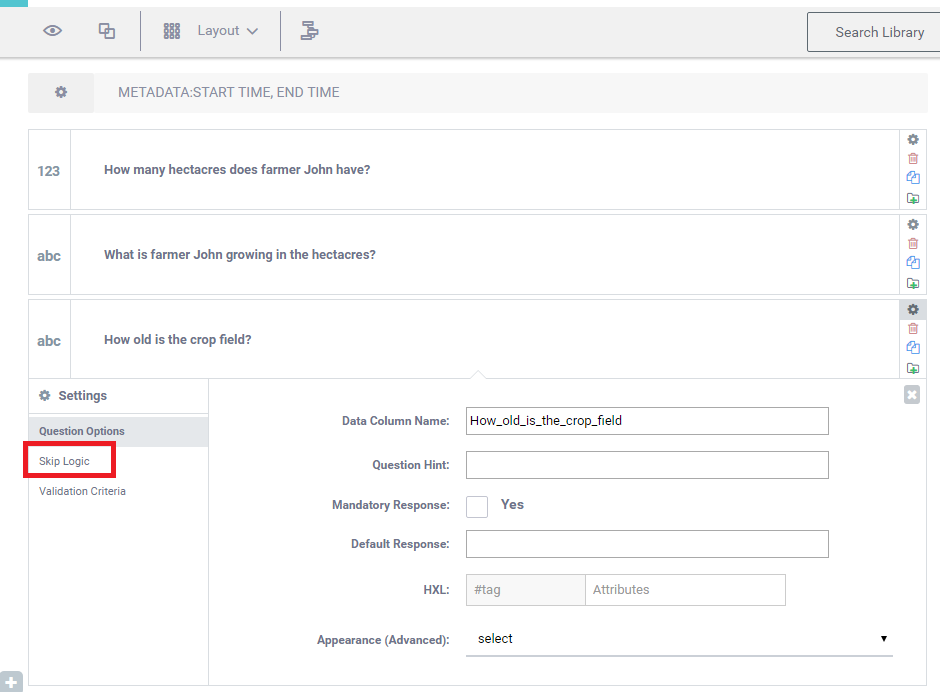
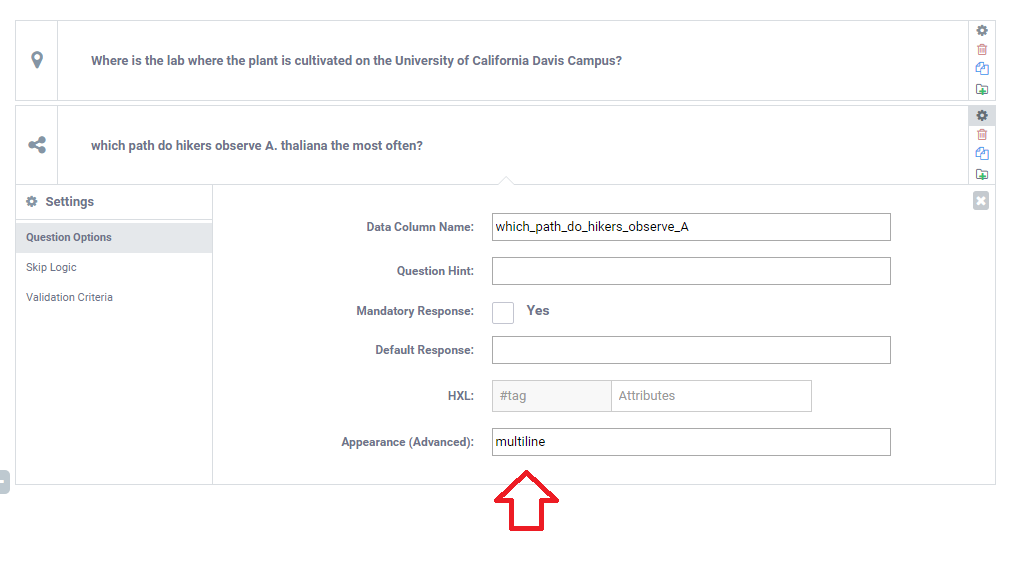
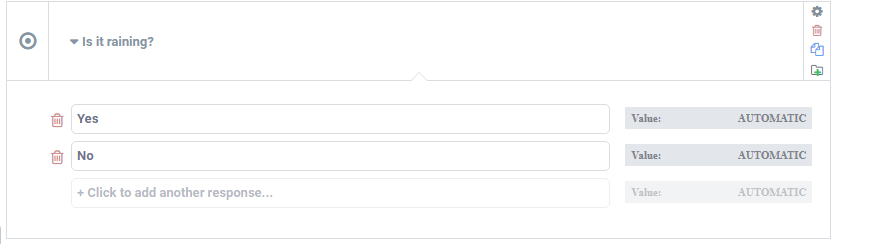
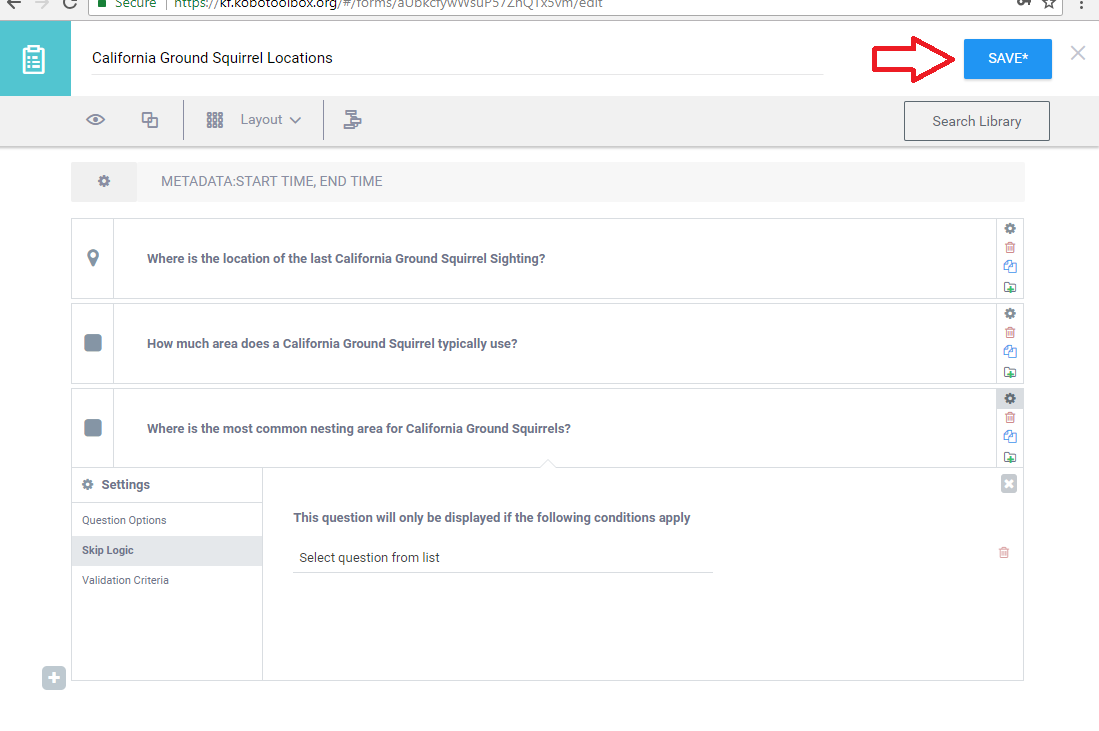
- To evaluate options for the question, select the settings symbol to the right of the question. Here you can edit the name, add a hint, tag, and use a default response. You can also select “Skip Logic” to display the question only when other conditions apply. For example:
Q1: Are you currently in school?
Q2: What directions did you take to get to school this afternoon?
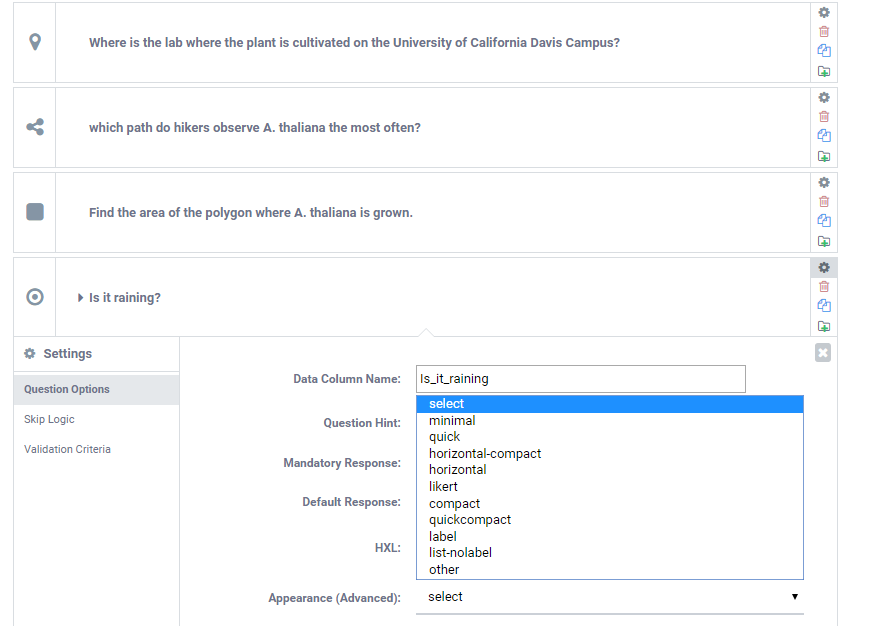
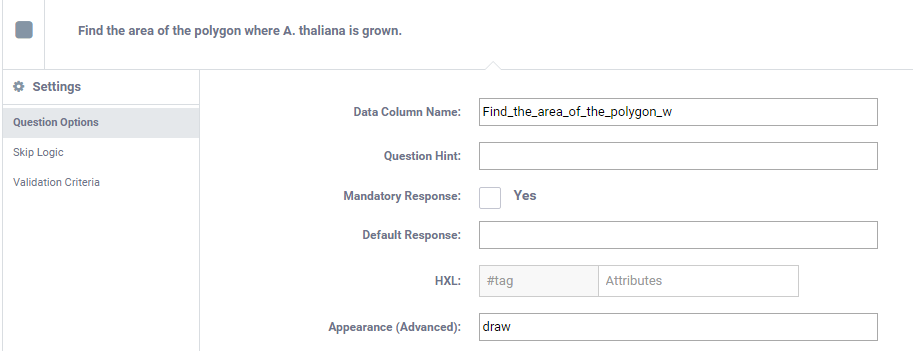
- Notice the “Appearance (Advanced)” option on the bottom of the screen. These options will allow you to change the appearance of questions on the form. Below is a table of possible appearance attributes and how questions appear in the form. → arrows point to geo-type questions.

Here are some examples:
Note: If you are asking a question with discrete answers or options, you may select the icon for “Select One”  and insert the answers.
- Save the project and return to the main menu.
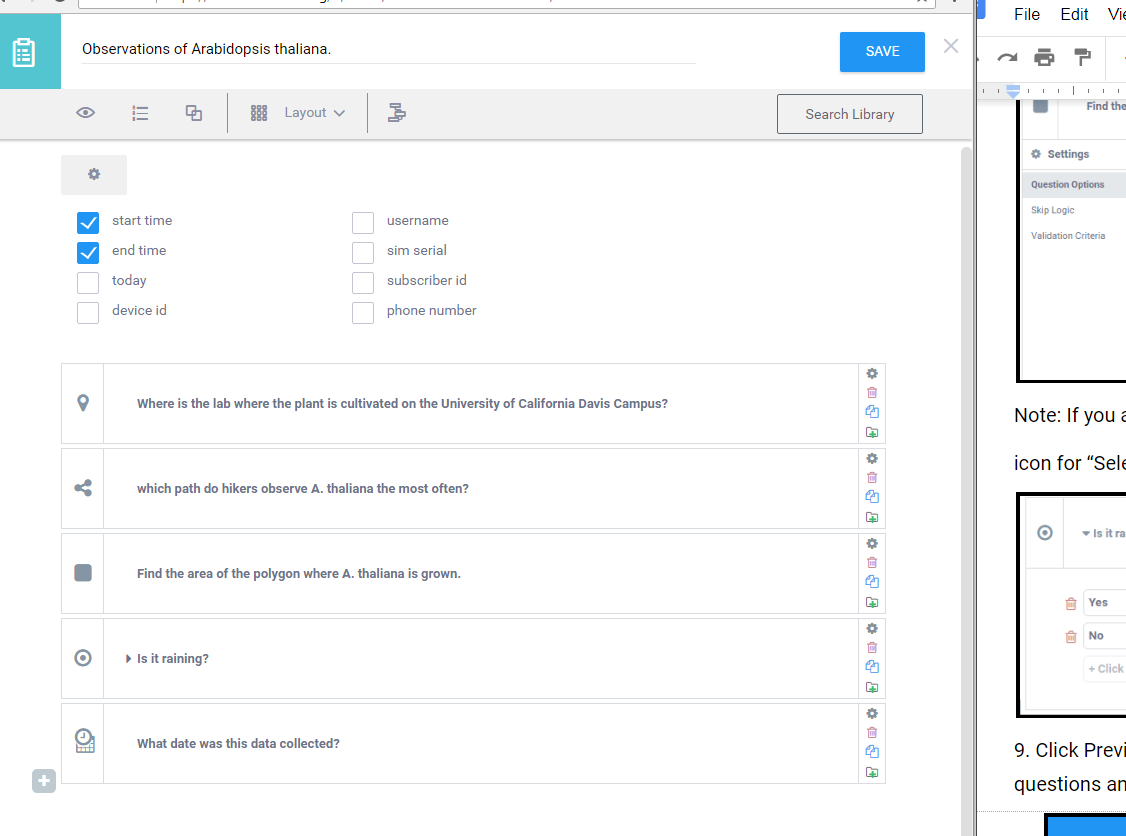
- Click Preview Form ( The eye icon near the top of the page) to quickly view the questions and test skip logic.

- Scroll to the bottom of the page and select “Validate”. A popup will appear, press close. Close the Form Preview and save the form by clicking the Create/Save button on , then ‘X’ to close the form.
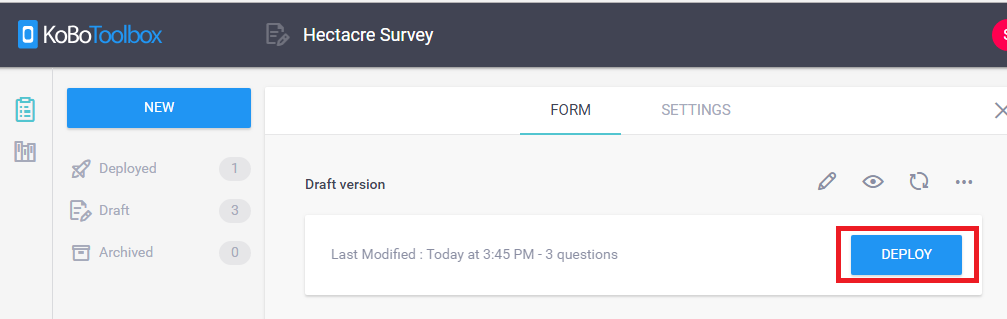
- To start collecting data you need to first deploy the draft form as a new data collection project.
Download Data as a CSV File
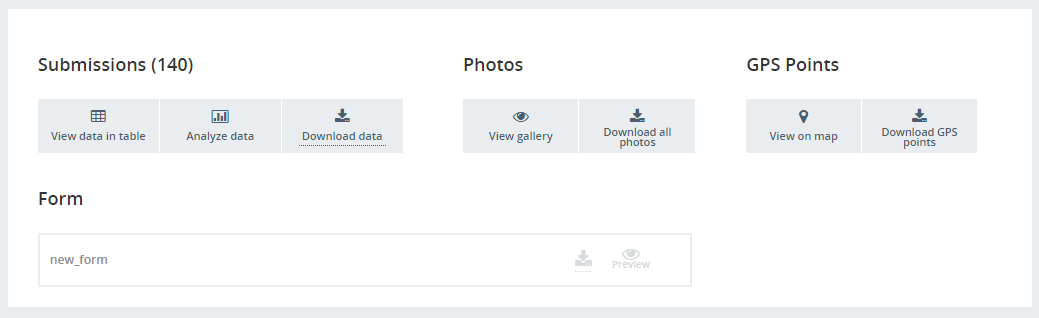
- Download data in CSV format as soon as any data has been collected. After you have sent the finalized forms, navigate to the Settings menu and select “Projects” and click on the project you wish to download as a CSV file.
- Select the project name and scroll to the bottom of the page. Under “Data”, select “Downloads”.
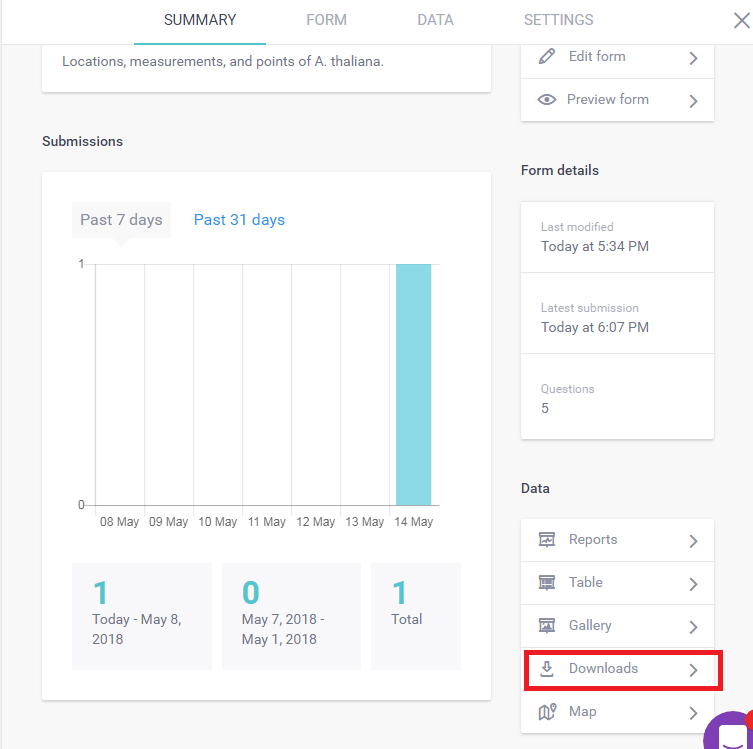
- Under “Select Export Type”, click on “CSV (legacy)” in the drop-down menu. You may also change the Value and header format to XML values and headers.
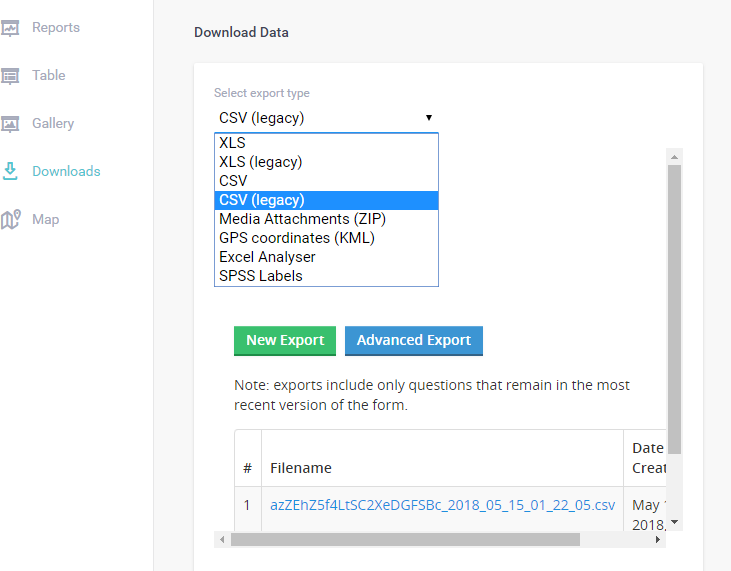
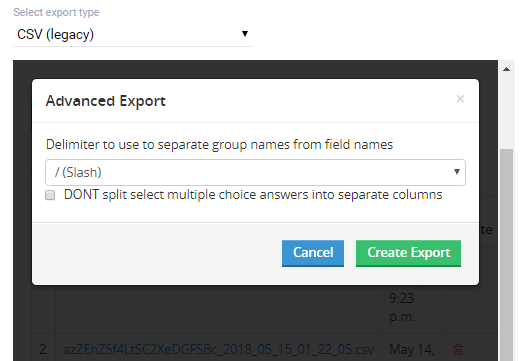
- Click on “Advanced Export” and then “Create Export”.
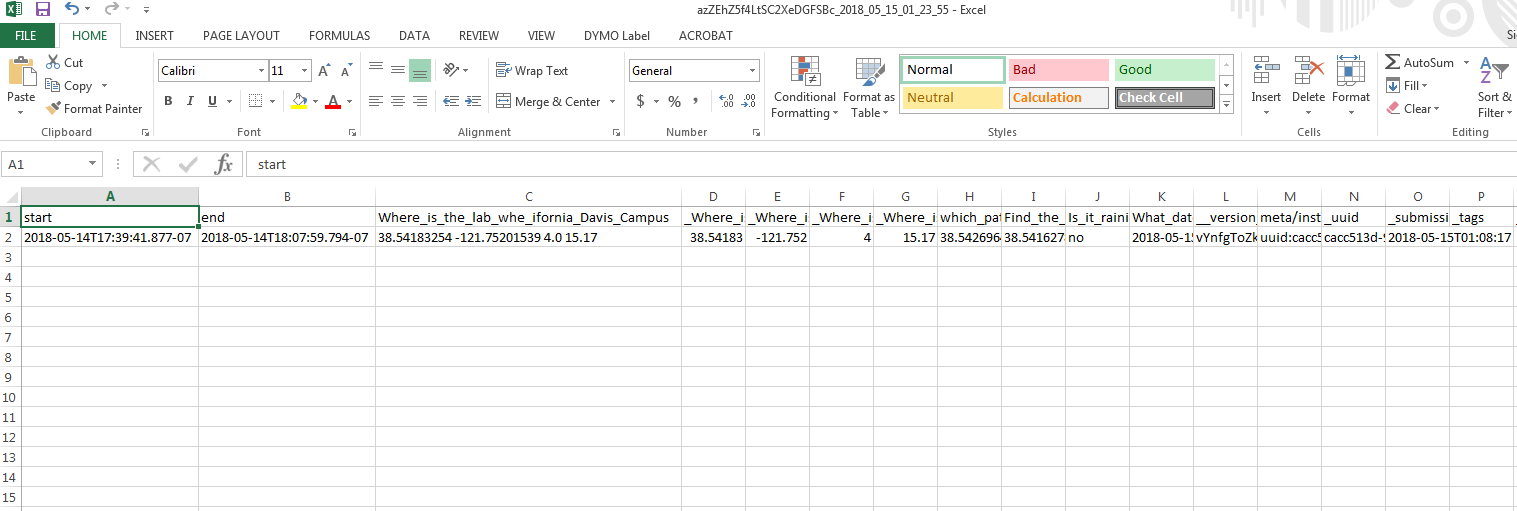
- Select the links underneath “Filename”. The data should download as an excel file. Open the data in excel. Each question should have a column. With the answer in the cell below.
- This CSV file turns the data into a text file which can be labeled as an x and y points. These points can be uploaded in a table to QGIS which will plot the data for you.
Import CSV files to QGIS
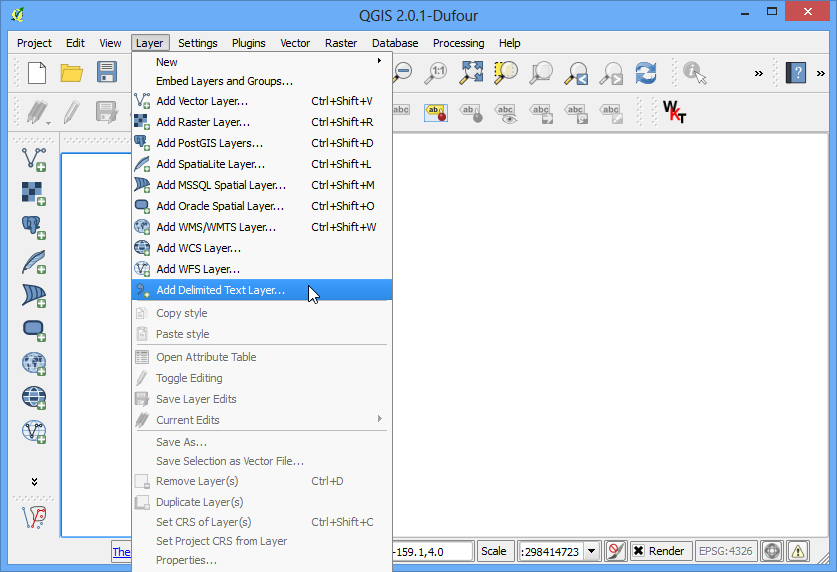
- Open QGIS. Click on “Layers” and then “Add Delimited Text Layer”.
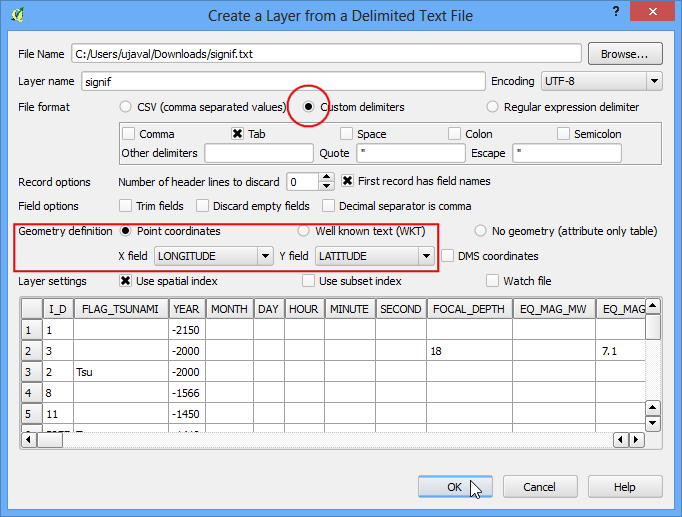
- In the Create a Layer from a Delimited Text File dialog, click on “Browse” to specify the path of the text file you downloaded. Add a layer name. In the “File format” section, select “Custom delimiters” and select “Tab”. The “Geometry definition” section will be auto-populated if it finds a suitable X and Y coordinate fields. In our case they are LONGITUDE and LATITUDE. You may change it if the import selects the wrong fields. Click OK.
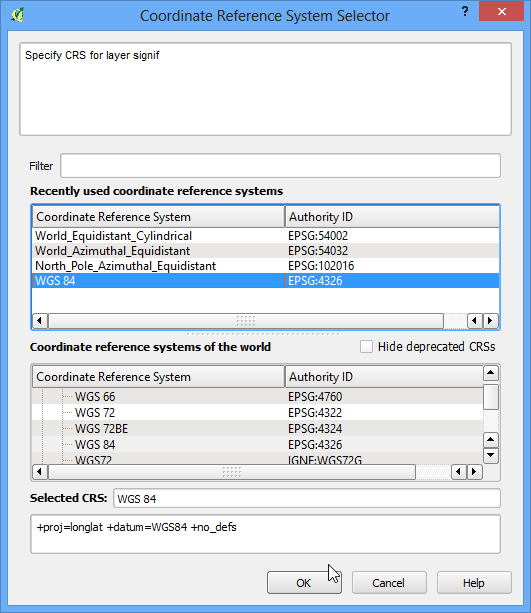
- Coordinate Reference System Selector will ask you to select a coordinate reference system. Since the coordinates are in latitudes and longitudes, you should select a WGS 84.
- From here you will be able to view the imported data in the QGIS canvas.
Download Forms from an Account
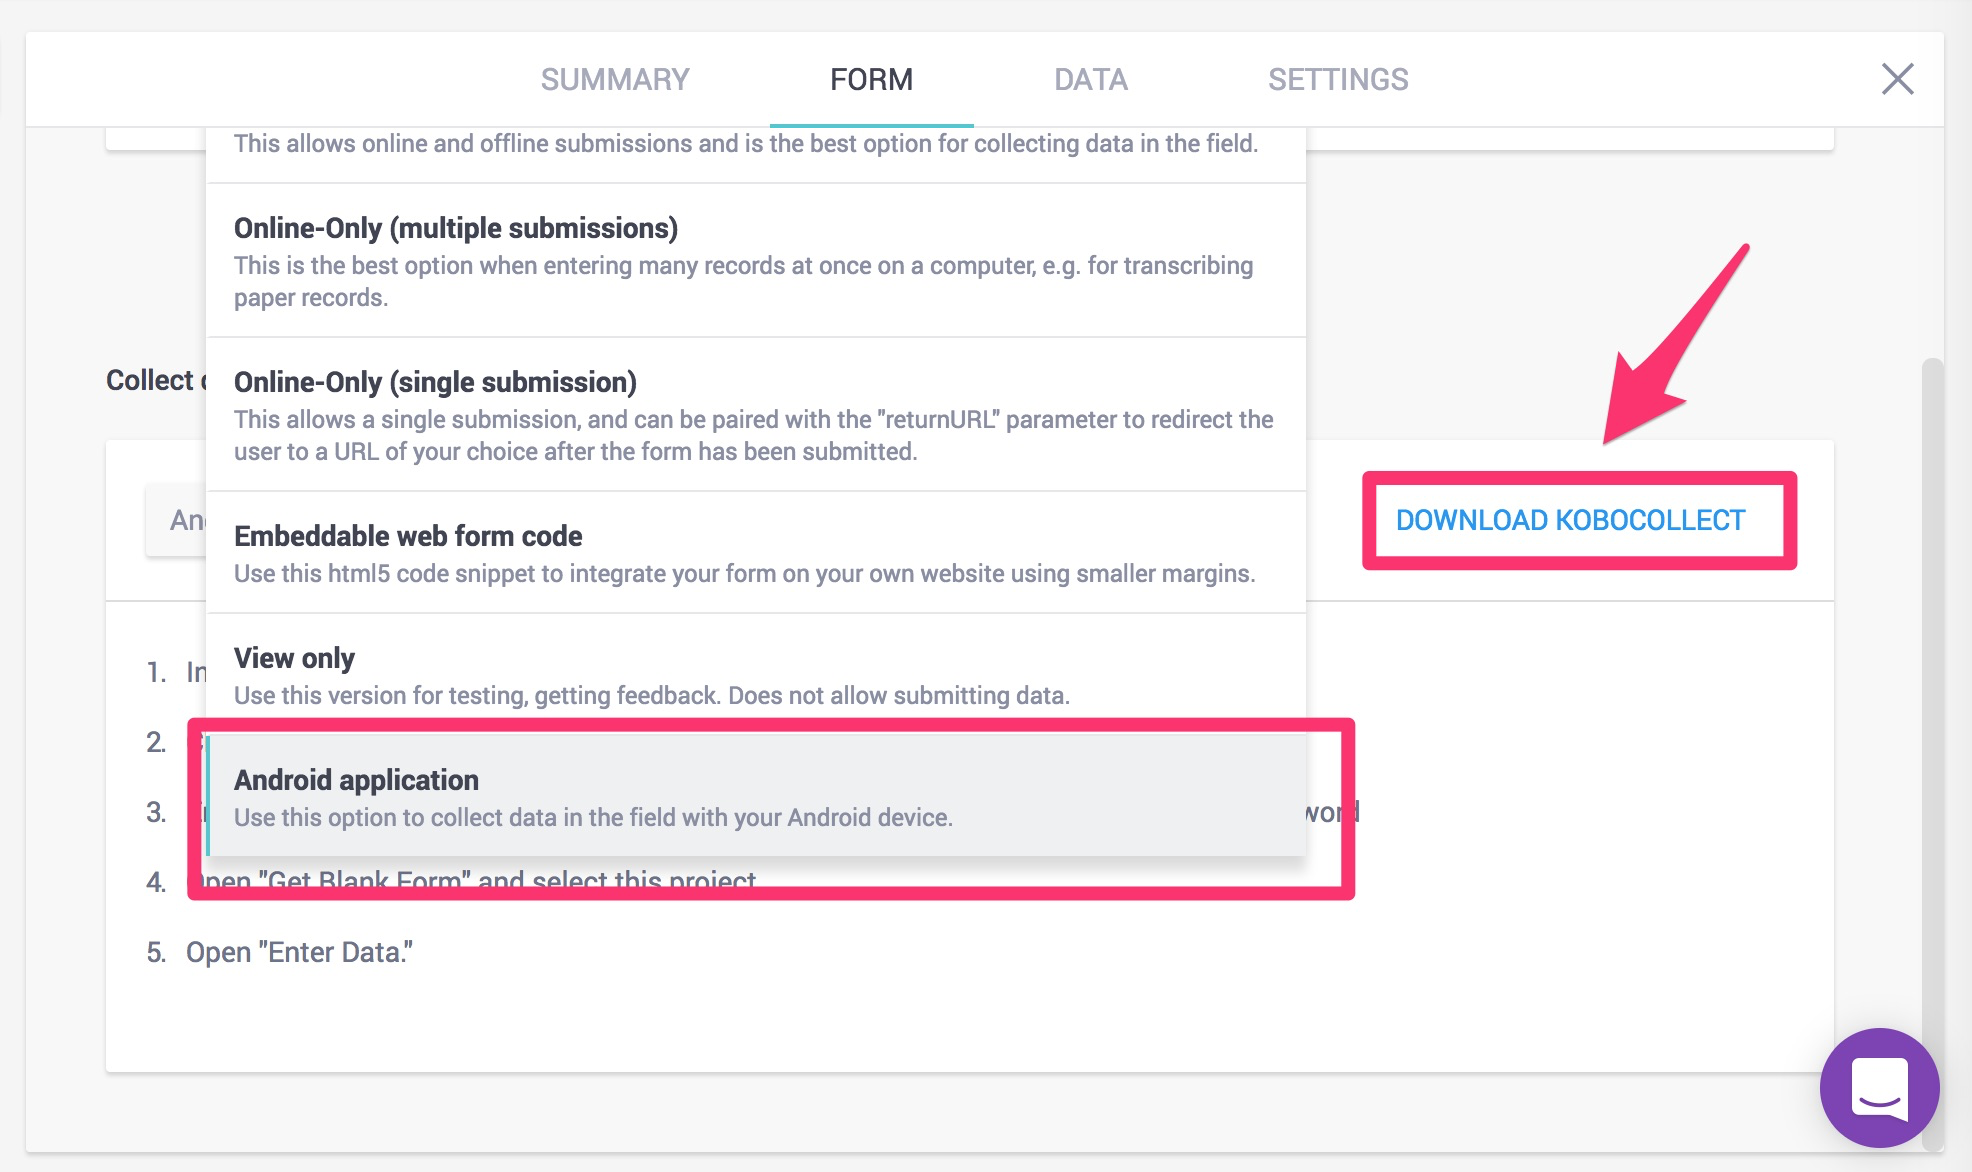
- Click on the project on the KoBoToolbox home page and select “Android application” under “collect data.”

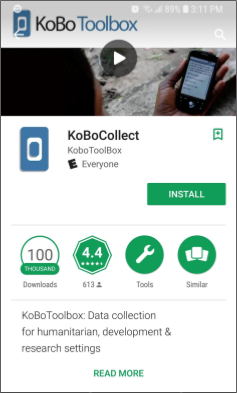
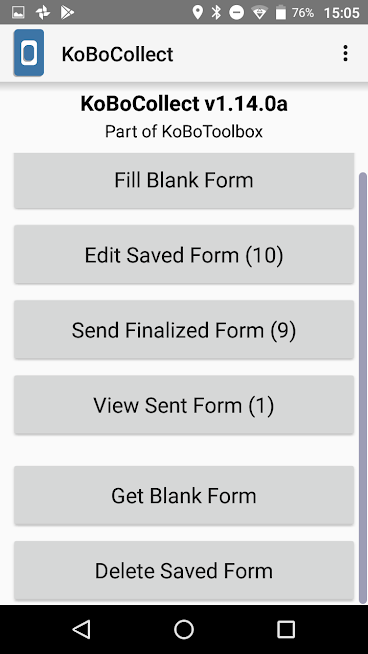
- Open or install the app on the Android device. The app is called KoBo Collect. The logo should look similar to the one below.
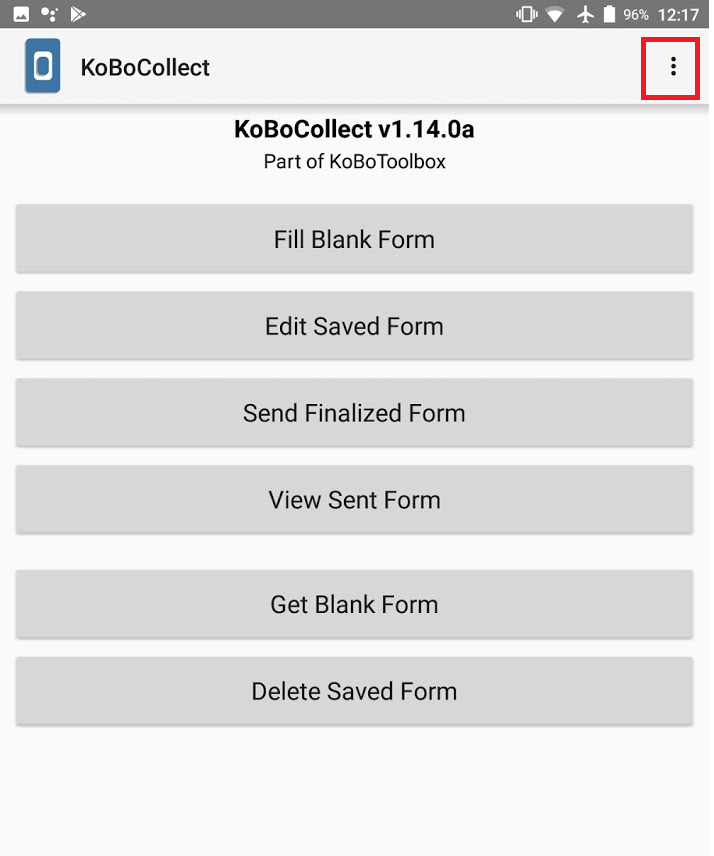
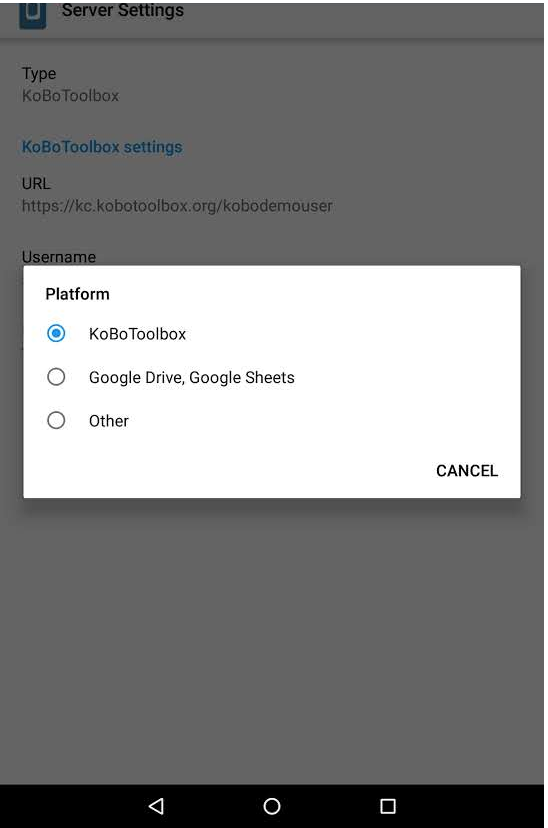
- Go to the General Settings option on the top right of the open app. Click on “Server” and enter the URL given online and your login information.
- Type in the username and password for the kobotoolbox account on the page that pops up. Select “KoBo Toolbox” as the platform.
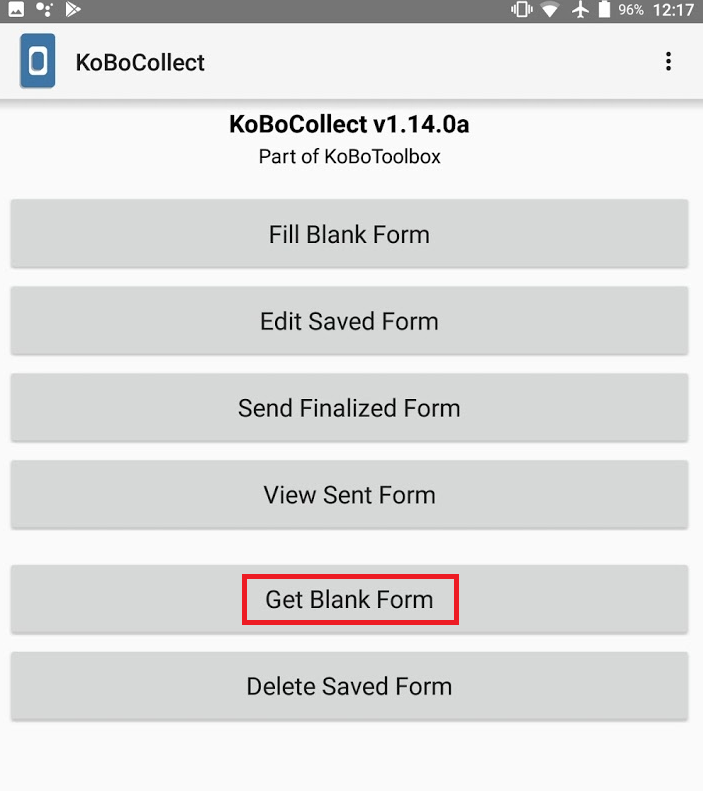
- Return to the main menu and select “Get Blank Form” on the list.
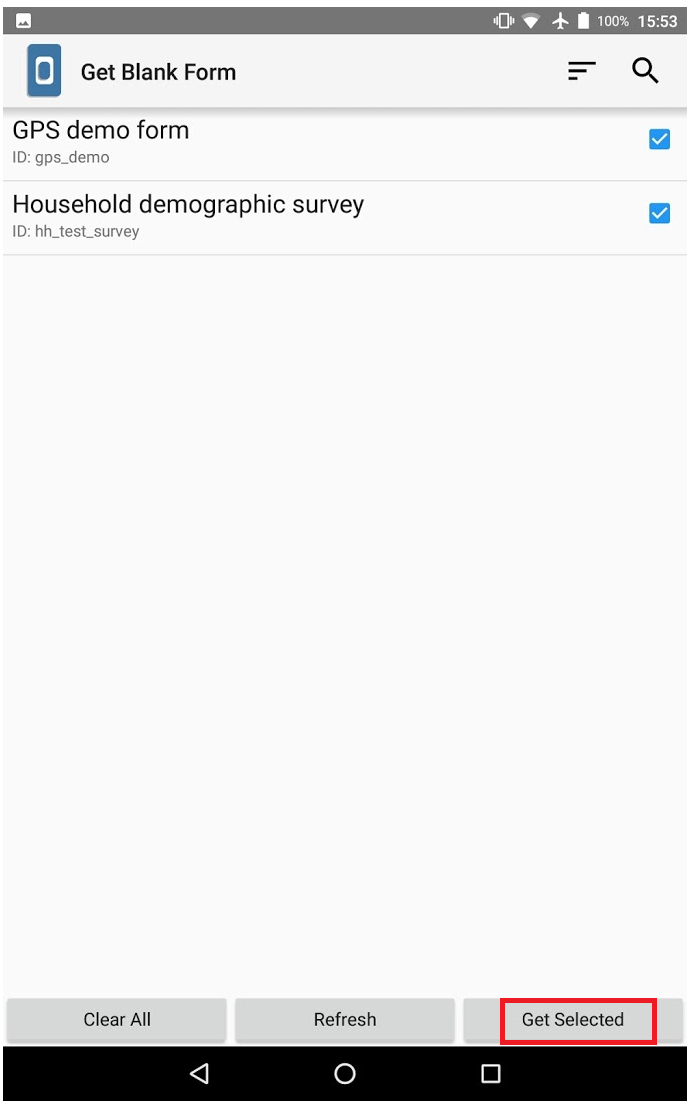
- A list of all the forms from the different projects will be shown. Click Toggle All (or select the ones you wish to download), then click Get Selected.
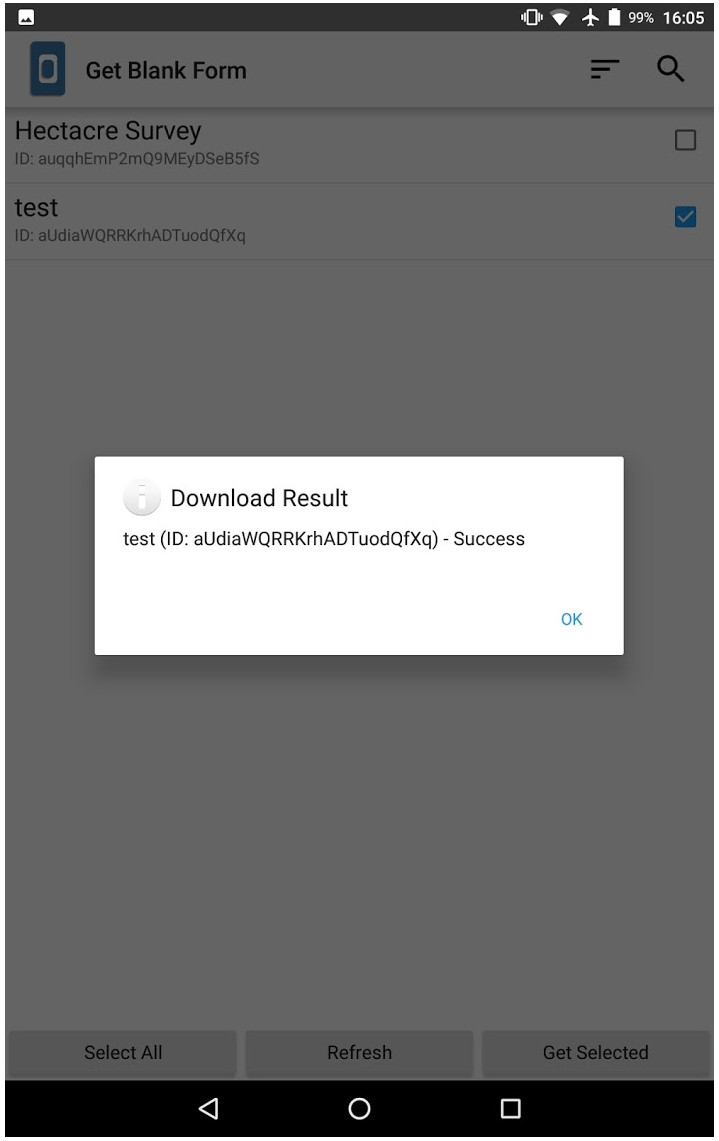
- A pop-up should appear confirming the download is a success.
Collect Data with KoBoCollect on an Android Device
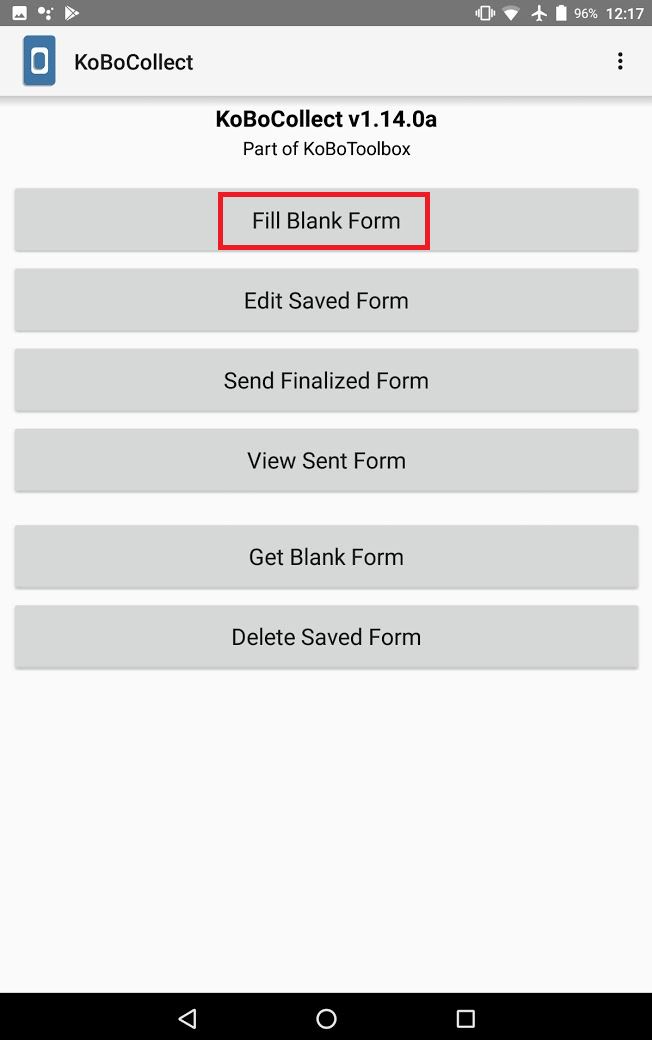
- Open KoBo Collect on your device and click on “Fill Blank Form”
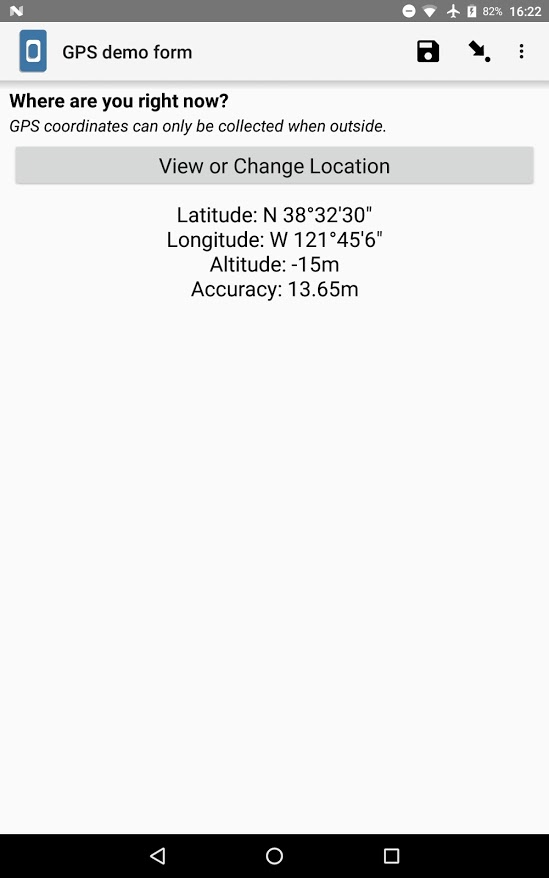
- Select the form to which you would like to enter data and go through all the questions (swiping your finger from right to left). If you selected a “point” then use the map to determine your location. To proceed to the next question, select the arrow pointing to the dot on the top right of the screen.
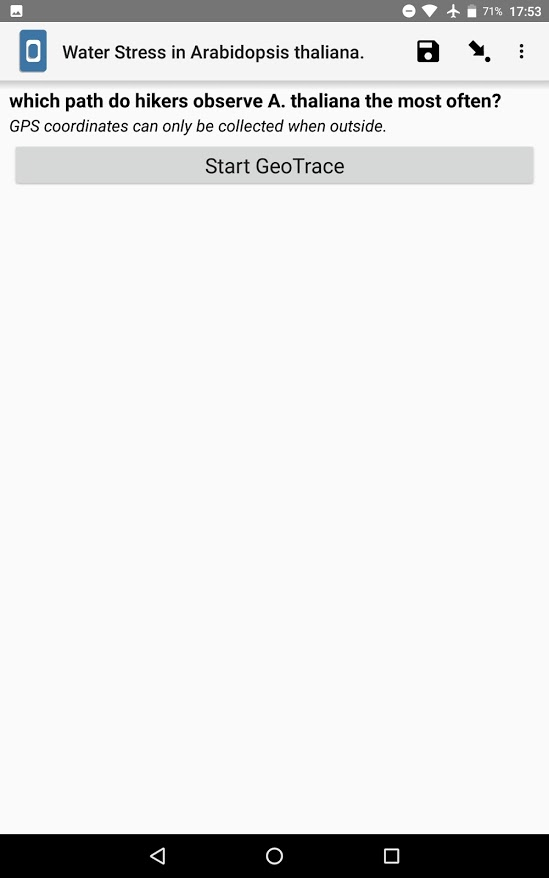
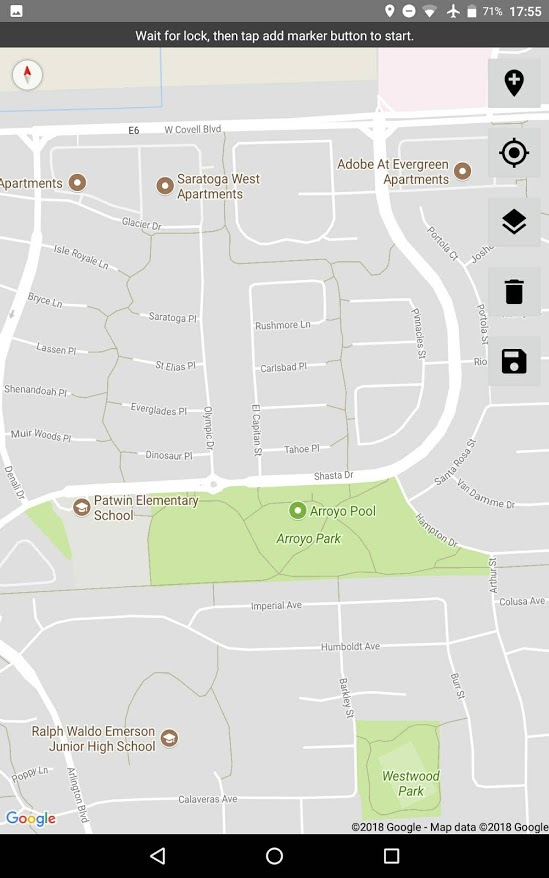
If you selected a line as the desired answer type, then select “Start GeoTrace”. Wait for the screen to lock and add marker button to start by pressing down on where you would like to create a path. Once a pin is placed, proceed to press down on the map where you would like to connect from the previous point.
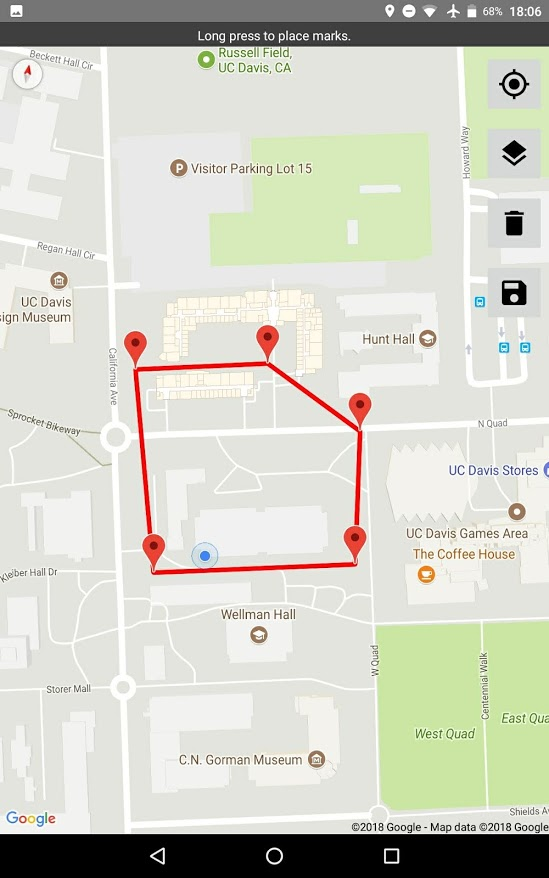
If you selected an area or polygon as the desired answer type, then create a polygon by long-pressing the screen to create a point. Once a point is placed, continue the process to create a polygon of three or more points.
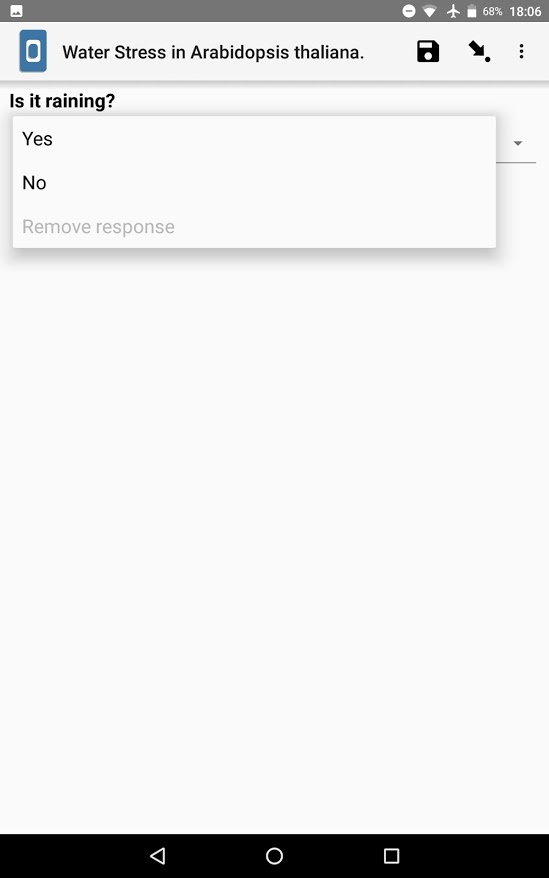
For “Select One” answers, a drop-down screen will be available. Select one of the answers chosen to be an option.
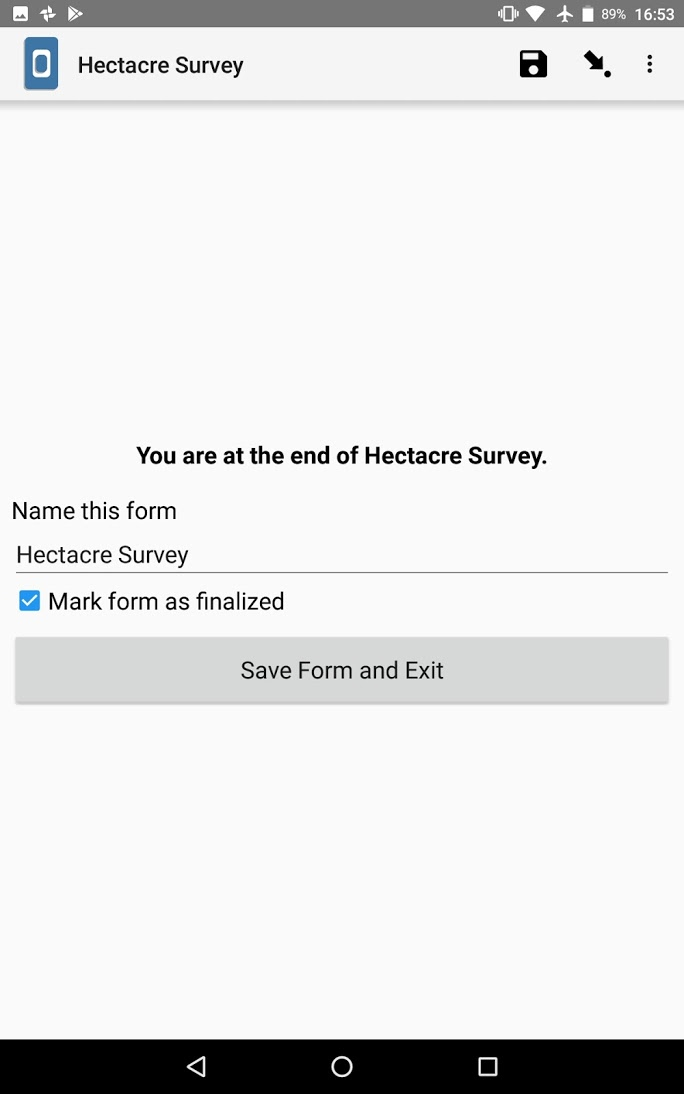
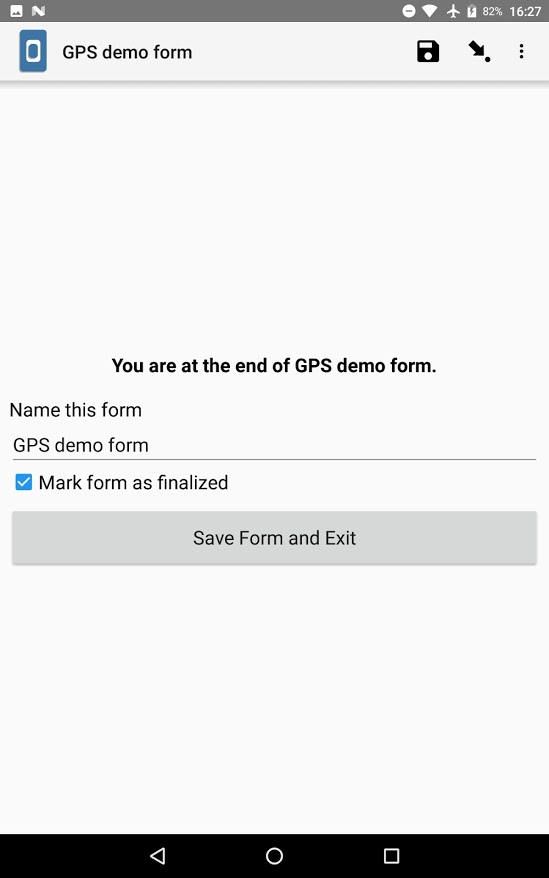
- At the end click on “Save Form” and then “Exit” (making sure the form is marked as ‘finalized’)
Upload Finalized Data
- Disclaimer: Data can be collected offline and then uploaded when there is an Internet connection. However, there is an advanced option to pull data locally. A user can transfer survey data from KoBoCollect using Open Data Kit through connecting the mobile devices by USB cable to a local computer. *
- Go to the home screen and select “Send Finalized Forms”.
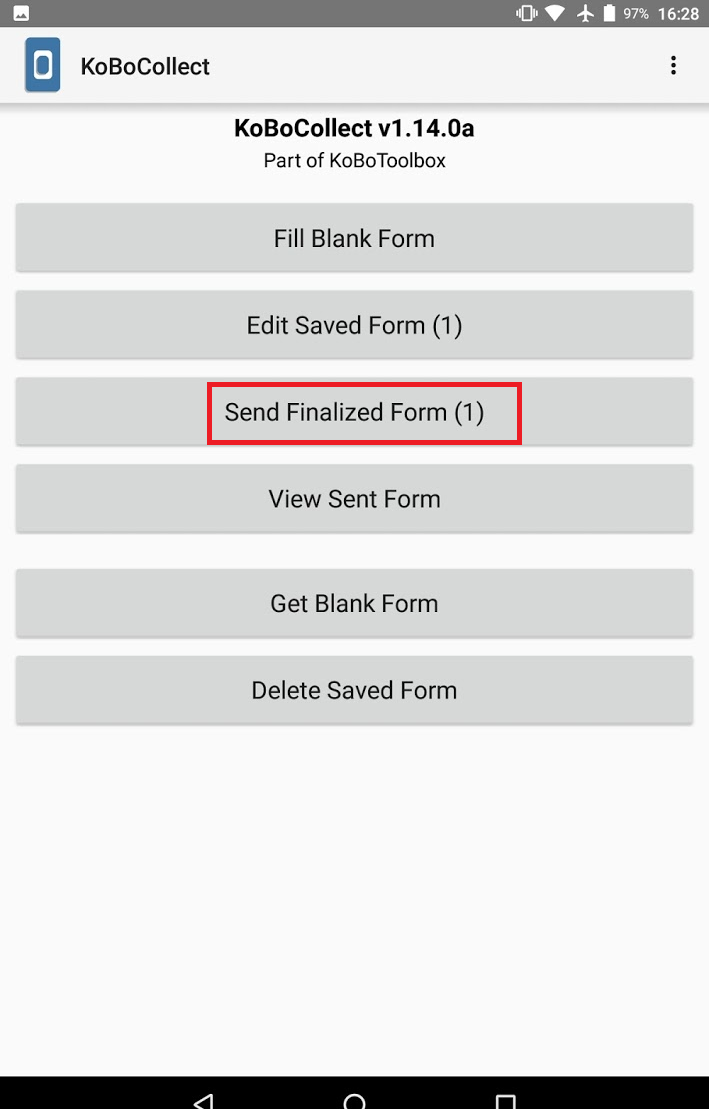
- A list of the collected forms appears.
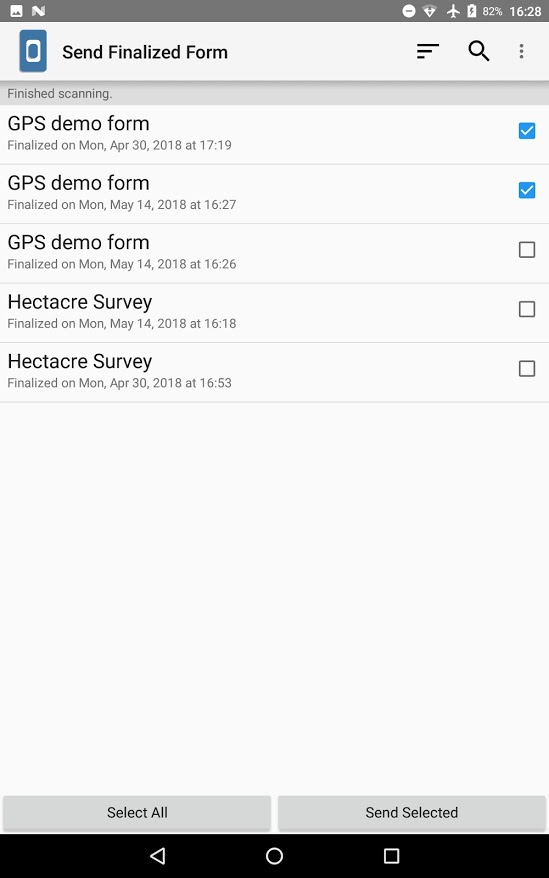
- Click on “Toggle all” (or select the ones you would like to send), then click “Send Selected”.
Review Data Online
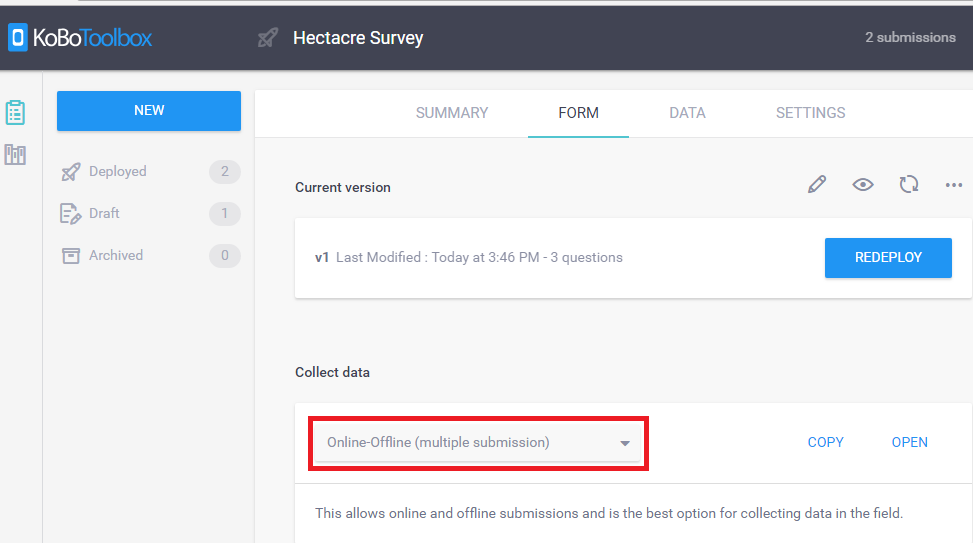
- Login to an account and select the project you wish to review
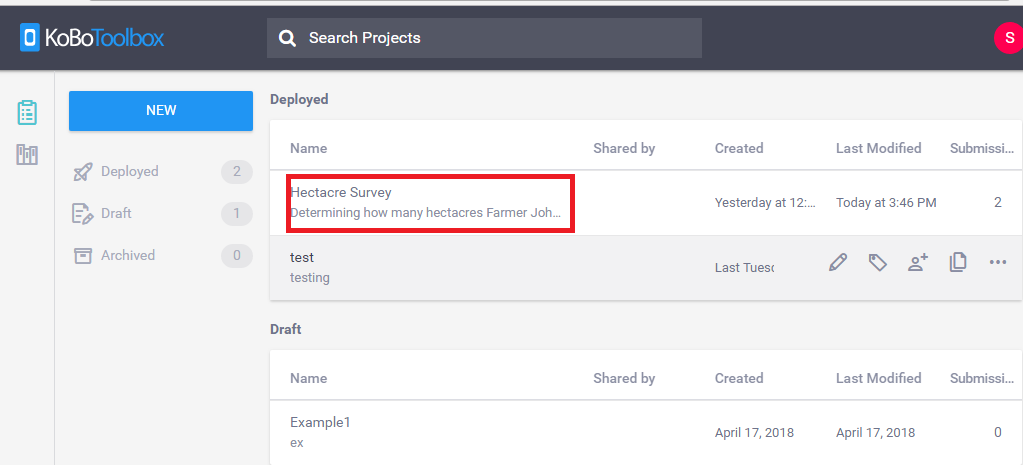
- Select the “Form” option at the top.
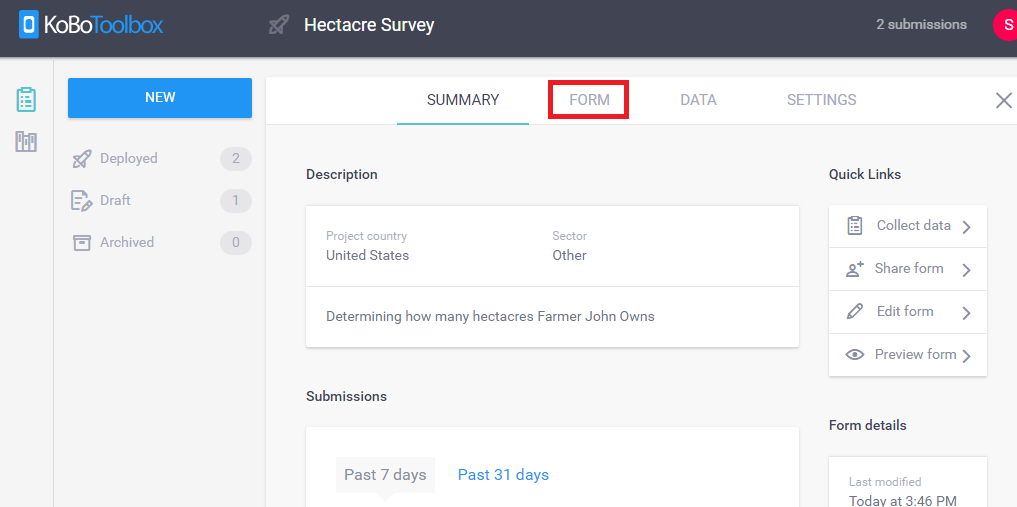
- Under “collect data” ensure you are on “Online-Offline” and select “Open”
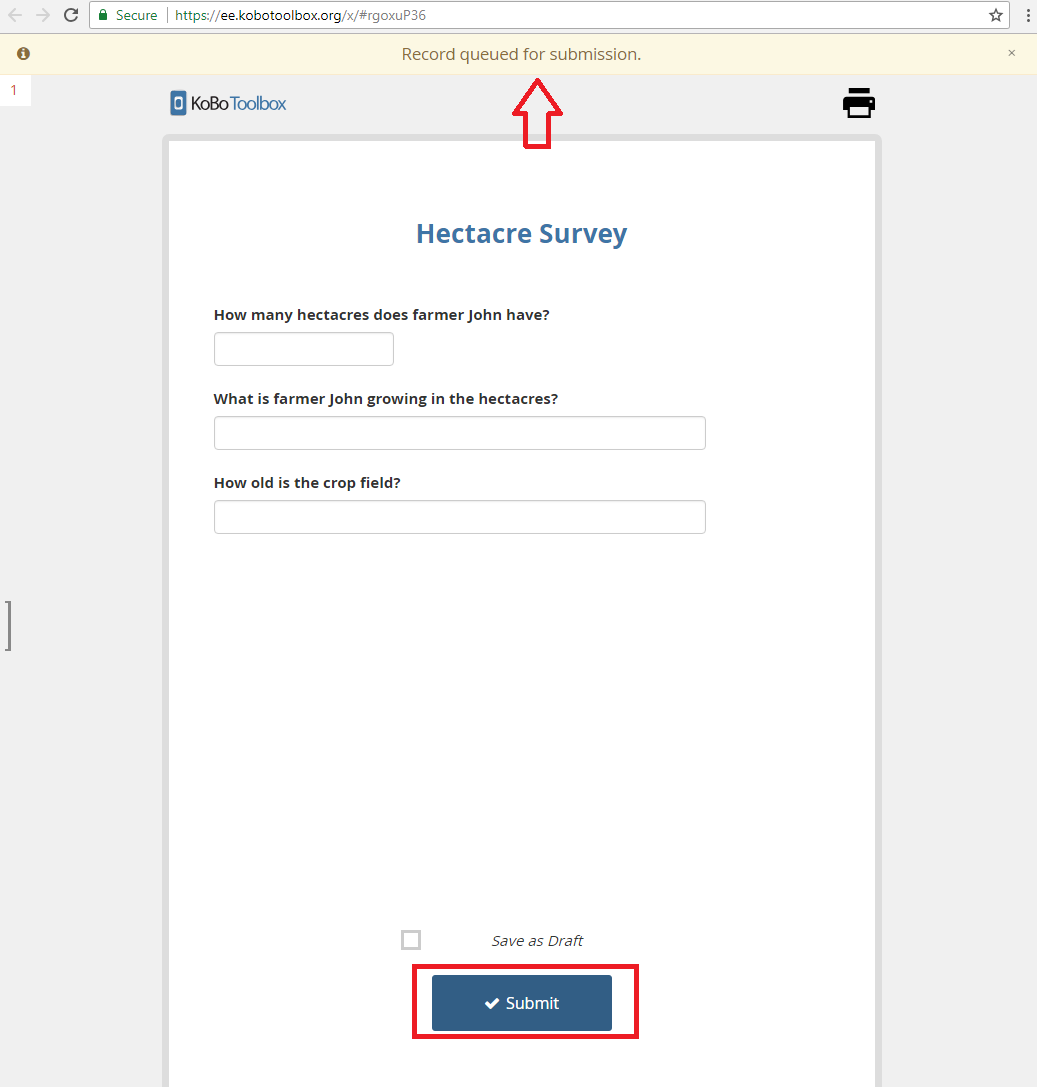
- Review the data and select “Submit”. A pop-up will appear at the top of the screen “Record queued for submission”
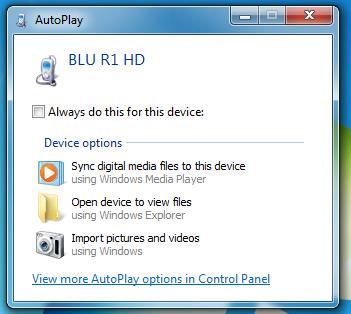
Upload Data to a computer without wifi
- Plug in the device to a laptop or computer. A pop-up will appear on the bottom right of the desktop screen confirming successful installation.

- Another pop-up will appear, select “Open device to view files”.
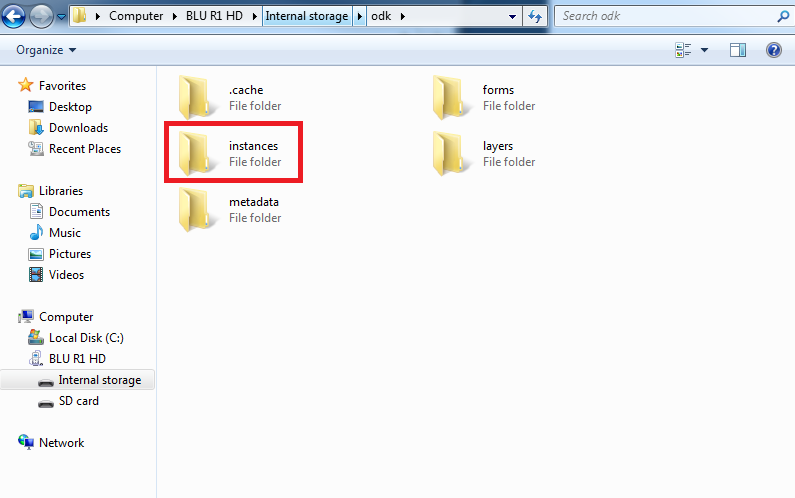
- Click on “Internal Storage” and find the folder that says “ODK”.
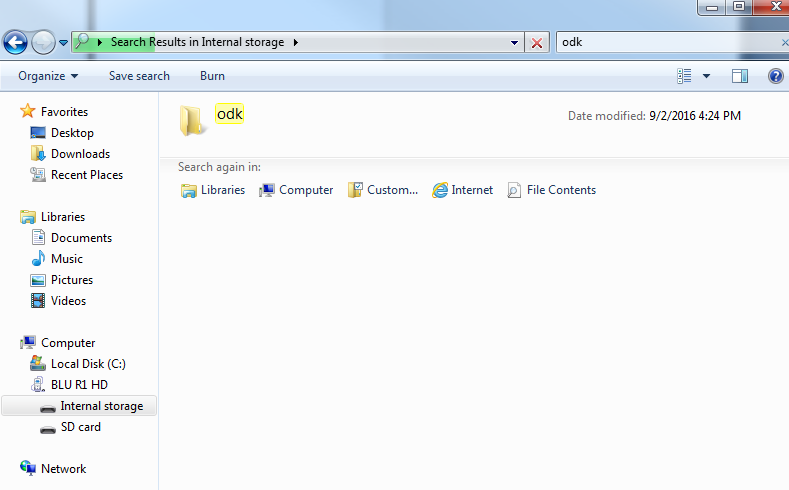
- Copy “Instances” and place it where you want to keep the files.
Misc Information
View GPS Points
- You will receive two options if your form contains any GPS questions and has submissions with coordinates
- To view GPS points online, click the button View on Map. This will show you an online map view.
- To modify layers on the map, select layers on the right of the screen (Google Satellite, Cloudless, Earth, etc.)
- Another option includes downloading GPS points as KML. Click on “Download GPS Points”. This will start a new export process with the latest data.
- Previous exports will be listed by their creation date, allowing you do see snapshots of GPS coordinates at various points in time.
- KML files can be imported in different types of software such as Google Earth or ArcMap.
Open Data
- Open Kobo toolbox on your laptop or tablet and choose the project you would like to open and select “Data” near the top of the page. From here you may view your data in map and tabular forms.

Open Data on an Android Device
- Open the Kobo Collect app and ensure the android application is selected under “Forms” online.
2.Select “Edit Saved Form”.
- Select the project you would like to open.
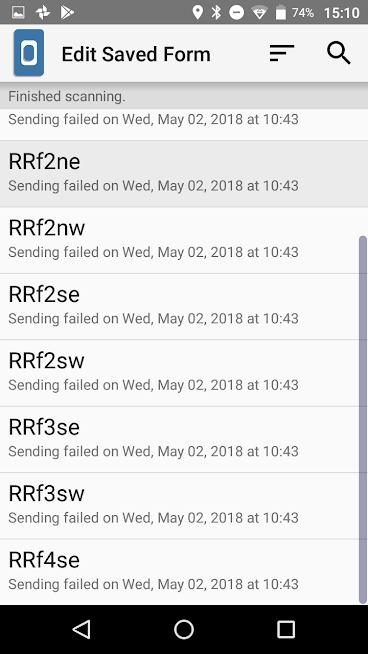
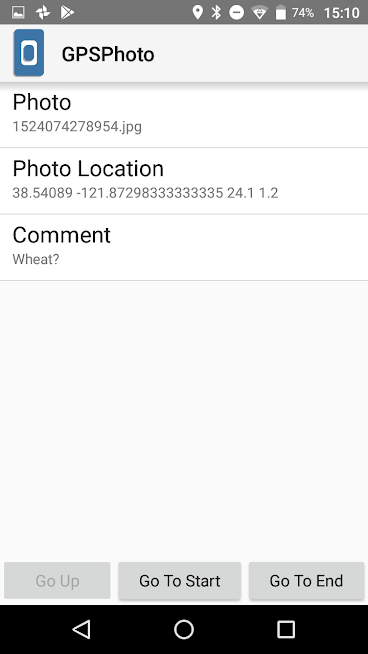
- Review the data you have taken and save or edit the data.
Review Data on a Computer without Internet
- Plug in your device to a laptop or computer. A pop-up will appear on the bottom right of the desktop screen confirming successful installation.
- Another pop-up will appear, select “Open device to view files”
- Click on “Internal Storage” and find the folder that says “ODK”.
- Copy “Instances” and place it where you want to keep
Using Rstudio you can use the following code: https://bitbucket.org/hijmans-lab/odklocal