Tile Stitching
Sometimes Pix4d will output multispectral data into tiles. These tiles need to be stitched together and then overlaid to create a single layer showing the reflective multispectral data. This can be done using the gdal extension within QGIS software.
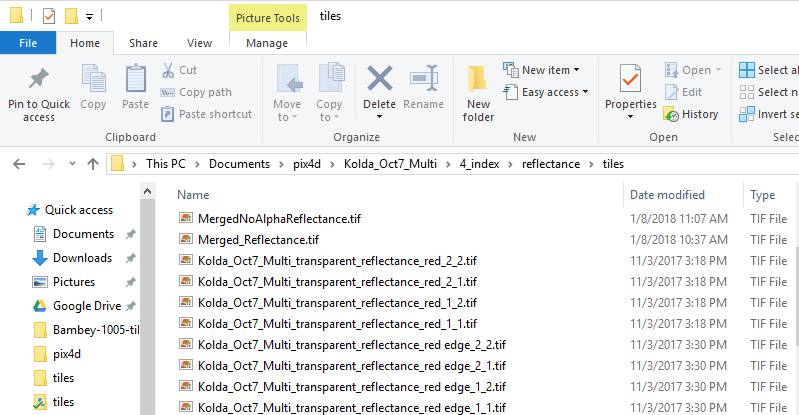
- Check your data. The tiles will be found in your pix4d data folder under 4_index > relfectance > tiles.
- You will want to check that you have tif images for the correct bands. Also check there is the same number of tifs for each band.
- Ensure that you have local copies on your computer and you are not looking at files in the drive. If you are then copy the tif files into a local folder.
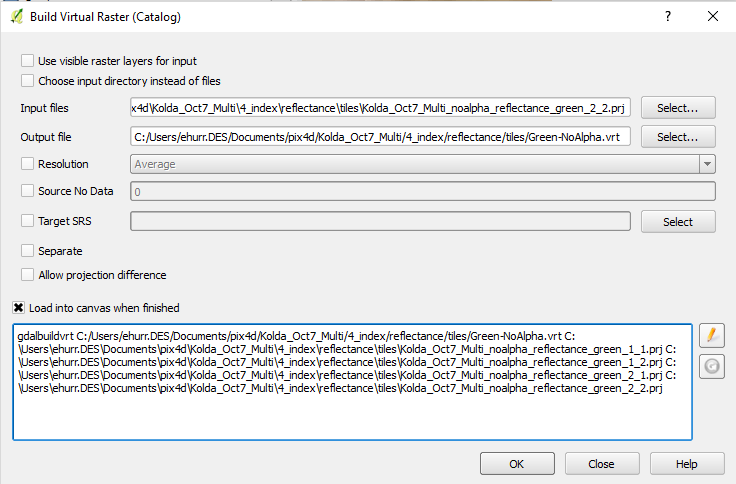
- Open up QGIS. Under Raster > Miscellaneous select Build Virtual Raster. For input files select all the tiles of a single band (ie red_1_1 to red_2_2_). Click Ok
- Select the NoAlpha tiles and not the Transparent_Reflectance version.
- For output, select the same folder as the input and title the VRT “Location-Date-Band-NoAlpha.vrt”
You should have a notification that the process is complete and the stitched tifs should now appear as one layer on canvas. Repeat this process with every band
Multi-Band Stacking
This is for when you have all the tiles of one band together as one image. This process merges the reflective tile into one image with mutliple bands.
- At the top of the QGIS window under Raster > Miscellaneous select Merge
- The input files should be the .vrt files you completed in the previous step
- Output should be “location-date-MergedNoAlphaReflectance.tif” and should be in the same folder as the data.
- Select each input file as a separate band
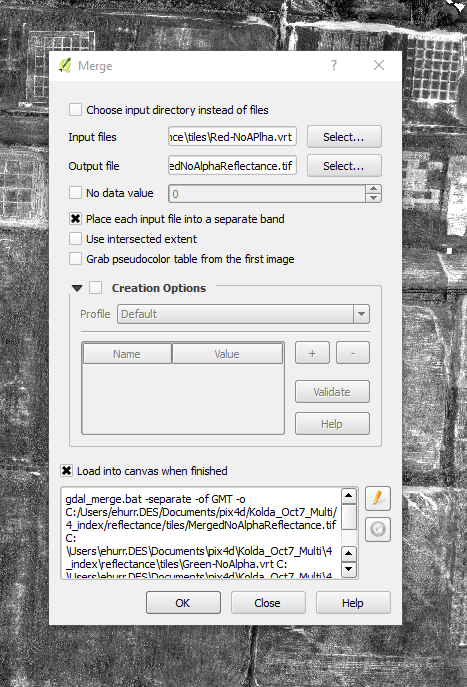
- Click the edit icon to the right of the command line window at the bottom of the prompt.
Replace the first line with the following text
gdal_merge.bat -separate -of GTiFF -co COMPRESS=DEFLATE -co PREDICTOR=2 -co ZLEVEL=9 -o
Make sure the bands are in the order if Blue (if applicable), Green, Red, Red Edge, NIR You can now run the command. It may take a few moments to process
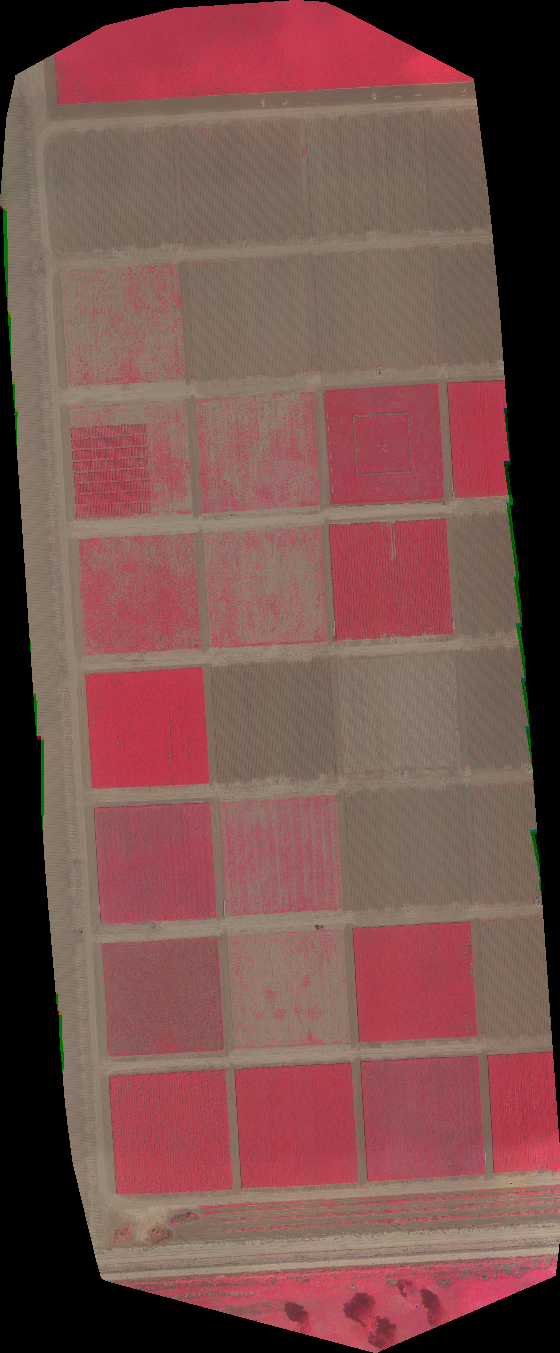
- You should now have a multi colored reflective single raster image. It likely will look purple or blue but you can convert it to a false color composite and it should like the example below. This file should be uploaded to the main results folder for this flight.